My company asked if I would make some ornaments and this is one of them. Now you can do so much with this by adding your own photos too! I've been told they look like they're floating.
 |
| Log cabin ornament |
I used 110mm Clear Acrylic Fillable Ball Ornaments.  They come in smaller sizes too. I got them at http://factorydirectcraft.com . You can also get them on Amazon too just be sure you read reviews. Alot said they received them cracked.
 They come in smaller sizes too. I got them at http://factorydirectcraft.com . You can also get them on Amazon too just be sure you read reviews. Alot said they received them cracked.
I had copies enlarged of the picture to fit in the ball. I traced the ball on cardboard and on the picture. Be sure to make copies with ink that does not run...from a LaserJet printer etc. You'll have to keep trimming to fit. I then glued the logos on both sides with Aleene's Tacky Glue and a piece of cardboard like a squeegee. Be sure they match up horizontally.
I then added Aleene's Snow I which I got at Michaels. There are other brands you can use too. I added the snow to the picture with a brush and my fingers...it's kind of hard to apply. I then brought snow up from the bottom of the ball to maybe a 1/2 inch and on the sides. I wanted it to look like little hills and piles of snow.
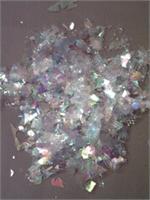
Put Aleene's Tacky Glue on the edges of the cardboard carefully and glue to the half ball with the lip inside. Before closing I sprinkled in Opalescent confetti.

I then used gold ribbon and glued along the seam of the acrylic ball. I used hot glue to tack at the top on either side of the hanger so the Tacky Glue could dry.
To do the flower at the top, I put in the wire hanger first. I took the leaves off an artificial flower, removed the plastic and slightly cut to fit over the hanger. I then had some left over gold leaves and hot glued on top of the green leaf for some extra sparkle and dimension. I used the Tacky Glue to secure. I then glued the flowers on either side of the hanger.
(I learned this tip from Heidi Borchers: Hot glue with temperature changes can sometimes release but the Aleene's Tacky Glue lasts.)
 |
| Snow covered Log cabin ornament Now this version ornament was much simpler. Get your photo copied and sized. You can use Aleene's Decoupage Medium or Mod Podge.Put the decoupage medium on the front of the photocopy with a spongebrush. Center it on the inside and with your fingers and work out the wrinkles from the center out. Then take the decoupage medium and brush all over the photo and inside. You can dab and turn the spongebrush for effect. You can lightly sprinkle glitter, opalescent confetti, gold thread etc. Follow the directions above for the ribbon trim and flowers. For more pizzazz if you have a wood burning tool you can put a hole in the bottom for a light.
This next ornament was from wrapping paper I saved. I carefully cut it out to get the detail and I didn't quite glue it entirely to the inside. It gives a really nice effect.
This next ornament I used a picture I cut out of a catalog. I painted the back of the picture with white acrylic paint so the writing on the back wouldn't show through. Again you can just make a copy as well. I then did a gold leaf around the edges with double sided tape and Martha Stewart Foil Transfer Sheets. There is just so much you can do with these! Get started for next year! Here's links for more ideas with Acrylic Fill-able Ball Ornaments How to Make 3D Ornaments Using Christmas Cards |


I just love these! Thanks for posting!
ReplyDelete